Lint looks harmless. It comes off the screen in a soft gray sheet, you toss it in the trash, and you don't think about it again. It is also one of the most flammable things in your house.
Most of that lint never reaches the trash. It goes down the duct behind your dryer and stays there, and that's the part almost nobody looks at. Which is why dryer vent cleaning matters, and why how often you do it is the difference between a routine chore and a real hazard.
The good news: this is one of the cheapest, fastest jobs on the whole home maintenance list. Here's the schedule, the warning signs, and where the line sits between what you can handle and what belongs to a pro.
Figures below reflect data from the National Fire Protection Association, the U.S. Fire Administration, the International Residential Code, and dryer manufacturers. Your owner's manual is the final word for your specific machine.
Why Lint in the Duct Is the Problem
Every load sheds lint. The screen catches most of it, but not all — the rest settles inside the duct that runs from the back of your dryer to the outside wall, narrowing the pipe a little more each month.
Two things go wrong as that layer thickens. Moist air can't get out, so the dryer runs longer and hotter to do the same work. And a growing pile of dry lint ends up sitting right next to a heat source.
The numbers are hard to argue with. The NFPA counted an average of 14,630 home fires a year involving clothes dryers or washing machines, causing 13 deaths, 444 injuries, and $238 million in property damage annually. Failure to clean was the leading contributing factor — one-third of dryer fires — and those particular fires accounted for half of the deaths. The item most often ignited first? Dust, fiber, and lint.
How Often Dryer Vent Cleaning Needs to Happen
Once a year for most households. That's NFPA's guidance and the interval professional cleaners work from.
Every six months if any of these describe you: you run the dryer most days of the week, there are four or more people in the house, your duct run is long or has several bends, or you dry a lot of towels and bedding — bulky loads shed far more lint than shirts do.
August is a good month to get it on the calendar. Dryer fires climb through fall and winter and peak in January, when heavier clothes and bulkier loads meet a duct that's had all year to fill up. Clearing it now means you head into the busy season with a clean pipe instead of a full one.
The Lint Screen Is a Separate Job
Cleaning the screen is not the same as cleaning the vent, and doing one does not cover the other.
The screen gets cleared before or after every single load. That's NFPA's recommendation, and it's the easiest habit in the house to build because the dryer is already open and you're already standing there.
There's a second part almost nobody hears about. If you use dryer sheets or liquid fabric softener, residue builds an invisible film across the mesh that blocks airflow even when the screen looks perfectly clean. Whirlpool recommends scrubbing the screen with hot water, a drop of liquid detergent, and a nylon brush every six months. Here's the tell: if lint falls off the screen while it's still sitting in the dryer, it's clogged.
It's the same idea as the HVAC filter you're supposed to swap every couple of months: once air can't move freely, the machine behind it works harder than it was built to.
Signs Your Vent Is Already Blocked
Don't wait for the annual reminder if you're seeing any of these:
- Clothes need more than one cycle to dry. A blocked vent can double drying time.
- The dryer or the clothes are unusually hot at the end of a normal cycle.
- A burning smell while it runs. Stop the dryer. Hot lint is usually what that is.
- Lint collecting around the outside vent hood, or a flap that doesn't open when the dryer is running.
Any one of these means the vent needs attention now.
If you have a gas dryer, treat a blockage as more urgent. That same duct is the path combustion exhaust takes out of your house, so a clear vent isn't only a fire question. Make sure there's a working CO alarm near the laundry area — our smoke and CO alarm check covers testing and placement.
How to Clean It Yourself
A short, straight run to an exterior wall is a real DIY job. You need a dryer vent brush kit — a brush head on flexible rods that thread together, $20 to $40 at any hardware store — plus a vacuum and a screwdriver or nut driver for the duct clamp. The kit pays for itself against a single service call, and you own it for the next decade.
Cut the power first. Unplug the dryer. If yours runs on gas, stop here and read when to call a pro — moving the machine means moving a gas line, and that's a different decision.
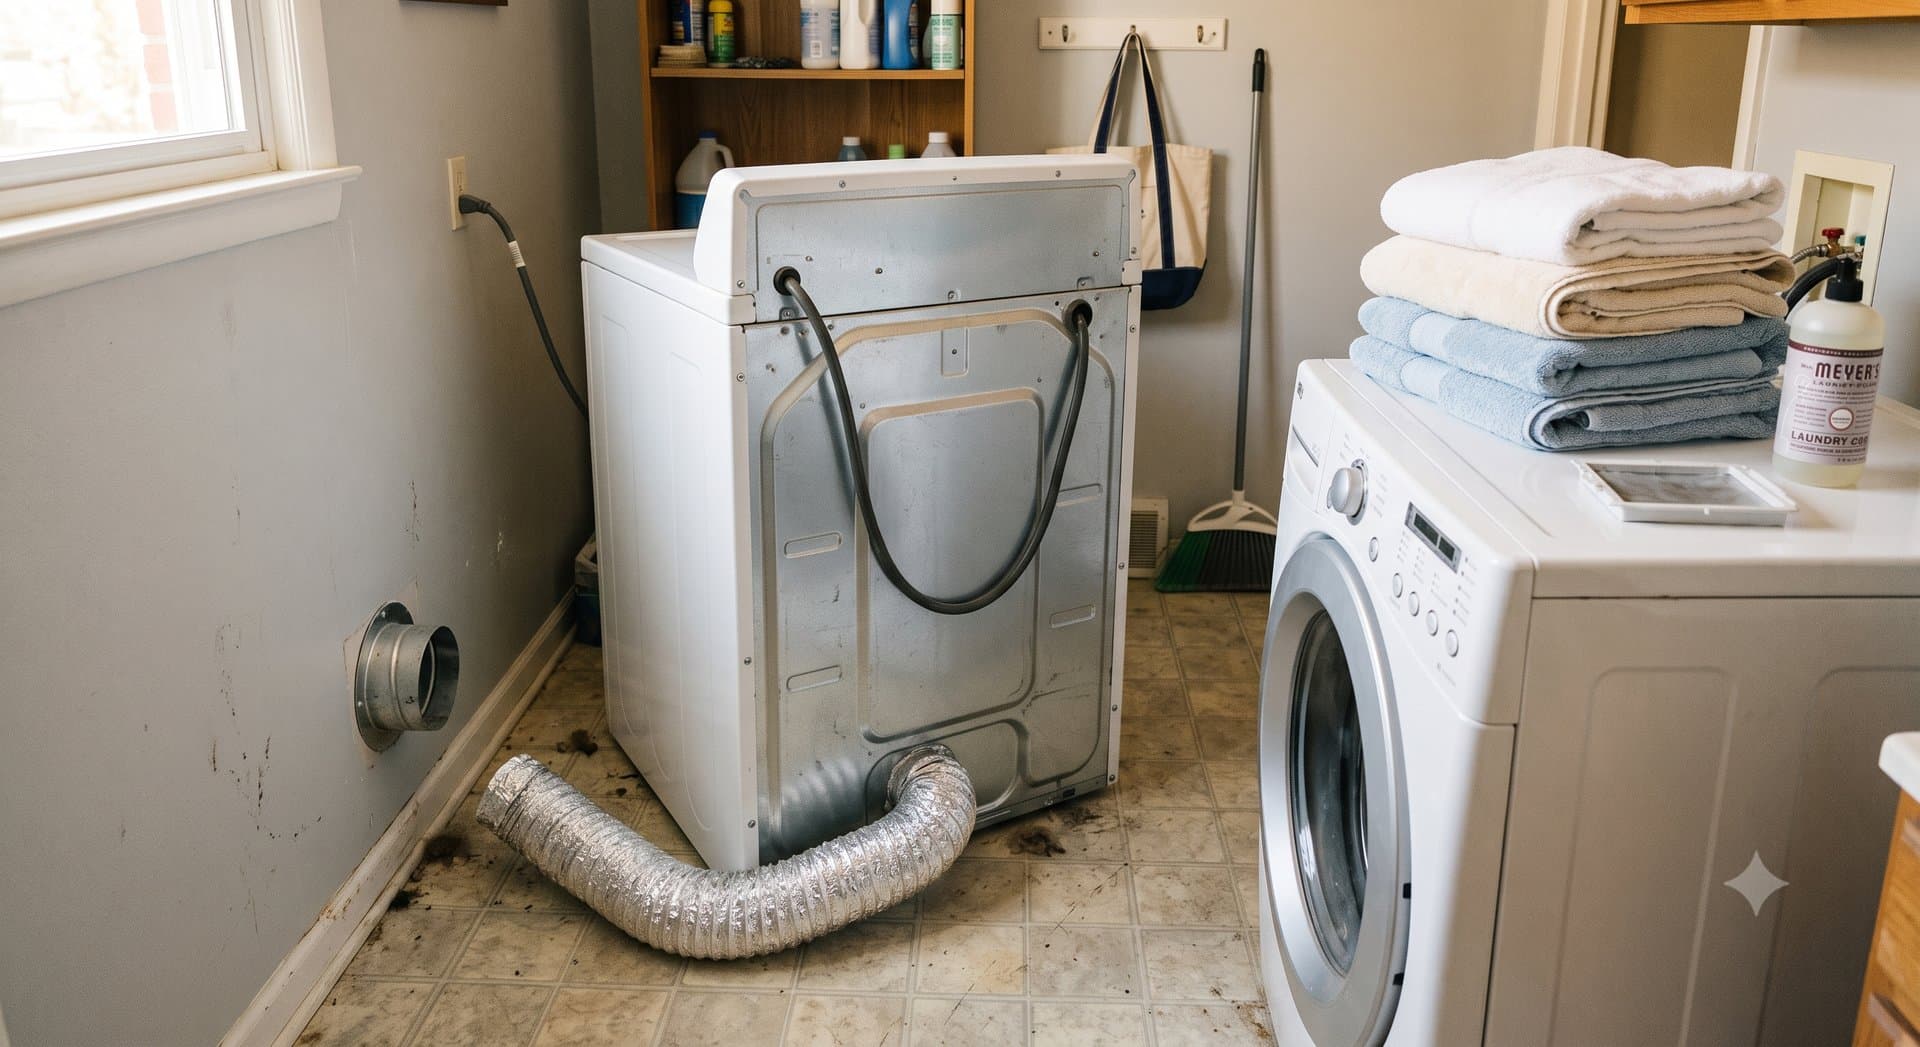
Pull the dryer out far enough to work behind it, about three feet. Walk it out corner by corner instead of dragging it, especially on vinyl.
Disconnect the duct at the back of the dryer, and at the wall too if you can reach that connection. Loosen the clamp or peel the foil tape.
Run the brush through. Feed it in from the dryer end, push toward the outside, and add rods as you go. Most kits chuck into a drill — and if yours does, spin it clockwise only. Running it in reverse unthreads the rods and leaves a brush head stranded in the middle of your duct, which turns an hour of work into a much worse afternoon.
Vacuum both ends, plus the floor behind the dryer and the lint trap housing — drop a narrow attachment down the slot the screen sits in. A surprising amount collects down there where no brush reaches.
Go outside and clear the hood. Pull the lint out by hand and check that the flap swings freely. If there's a fine mesh pest screen over the opening, it's catching lint and it isn't code-compliant — that's a good moment to replace the hood.
Reconnect with a clamp or foil tape, never screws, and don't shove the dryer back flush against the wall. Crushing the duct into a flattened elbow undoes the work you just did.
Finish with a 10-minute fluff or air-dry cycle, then step outside and put your hand near the hood. Strong, steady airflow means you're done.
First time through, budget an hour — most of it spent working out what you're looking at. Next year it's closer to thirty minutes.
Take a Look at What Your Duct Is Made Of
While you're back there, notice the material. Building code (IRC M1502) calls for a 4-inch rigid or semi-rigid metal duct with a smooth interior. The white plastic and thin foil accordion hoses still sold in hardware stores aren't permitted in concealed runs, and they're a poor choice anywhere — the ridges grab lint, they crush flat behind the dryer, and they burn.
Two more code details worth knowing before anyone tells you otherwise: the total run can't exceed 35 feet, and bends count against that — a 90-degree elbow eats 5 feet, a 45-degree elbow eats 2.5. Joints are sealed with clamps or foil tape, never screws, because a screw tip poking into the duct is a lint hook.
If yours is plastic or foil, or the run is long and full of turns, that's a conversation worth having with a pro. Swapping a short run for metal is a modest job. Rerouting a long one is not.
What a Pro Charges, and When to Call One
Professional dryer vent cleaning runs $100 to $250 for most homes, with a national average around $145. Vents that exit through the roof, or ducts that need a bird's nest removed, land at the higher end — roughly $150 to $250. For an annual service, that's one of the better deals in home maintenance.
Call someone when the vent exits through the roof or an upper floor, when the run is long or has multiple bends, when you can't safely move the dryer, or when you're seeing the warning signs above and want it confirmed rather than guessed at. A pro brings a rotary brush on a long flexible rod and a vacuum, and can tell you whether the ductwork itself is the real problem.
And this is the line for gas dryers. Cleaning the duct means pulling the machine out, and on a gas dryer that means moving a gas line — a flexible connector that fatigues, at a joint you can't see leaking. If your dryer is gas and the duct needs more than a hood cleaning from the outside, that's the point to stop and hand it over. An annual service call is cheap next to the alternative.
Put the Laundry Room on a Schedule
Nothing about this is difficult. The trouble is that it comes around once a year, from a machine that never complains, tucked behind an appliance you'd rather not move. It's the definition of a task that quietly falls off the list.
That's the gap Mintain fills. Add your dryer under the Home category with the Dryer Vent Cleaning template, and while you're in the laundry room, add the Washing Machine Hose Inspection template too — annual, and the other thing in that room that fails expensively when it's ignored. Mintain reminds you before each one is due and keeps the history, so next August you'll know exactly when the vent was last cleared and who did it.
Free for up to 4 items, so the dryer and a few other things cost you nothing. Pro is $1/month or $10/year if you're tracking more.
Start tracking your home in Mintain at mintain.app →
Give it an hour once a year, and the most flammable thing in your house goes back to being nothing more than lint.
This is part of Mintain's weekly maintenance blog. Every Monday, we publish a new guide to help you stay ahead of home, auto, yard, and equipment maintenance — so nothing catches you off guard.